
Computing technology is still one of the fastest evolving industries in the world, so it can sometimes be difficult to keep up with the next big leap forward. A few months after you’ve bought a new PC, the next model is out, and you need to upgrade again. Modern computers can withstand a lot of punishment from users, and most can last a very long time, but sadly we don’t live in a super high tech future where computers will last indefinitely. Sometimes a computer will give up the ghost without warning, parts will fail, or you might just notice it going very slowly. Whatever the reason, at some point you will find yourself shopping for a shiny new machine to replace your old reliable one. But before you sell or throw away your old computer, make sure you remove the hard drive!
Why Do I Need To Remove My Hard Drive?
A lot of people when selling their old laptops or computers will do a factory reset and format the hard drives to make sure their data is not on there when they pass it on to a new owner. But while the idea behind this is solid, the reality is that formatting your hard drive does not remove the data from it. A study done by students at MIT in 2003 proved this by buying 258 used hard drives, 68% of which had been fully reformatted and subjected them to some basic forensic software programmes. This readily available software enabled them to recover over 5,000 credit card numbers, medical records, social security numbers and other highly personal and sensitive information from the hard drives, all with just a few clicks of the mouse. In short – just because you formatted the drive doesn’t mean it’s clean. Instead, you could be giving away your information to a complete stranger. It’s a scary thought. Fortunately, there is an easy way around this. All you have to do is remove the hard drive.
Desktop Units
For desktop units, this process is pretty simple. First, you need to make sure you have backed up your data so that you don’t lose anything. Next turn the power off and unplug everything from your machine. Disconnect the internet and fully unplug it from any mains sockets to avoid electric shock. Now open up the computer case. Each model is manufactured differently, so you might need to unscrew a side panel or press a specific latch on the case to do this. The instruction manual for the machine may tell you how to do this. Otherwise, an internet search should find the information you need if you’re not sure.
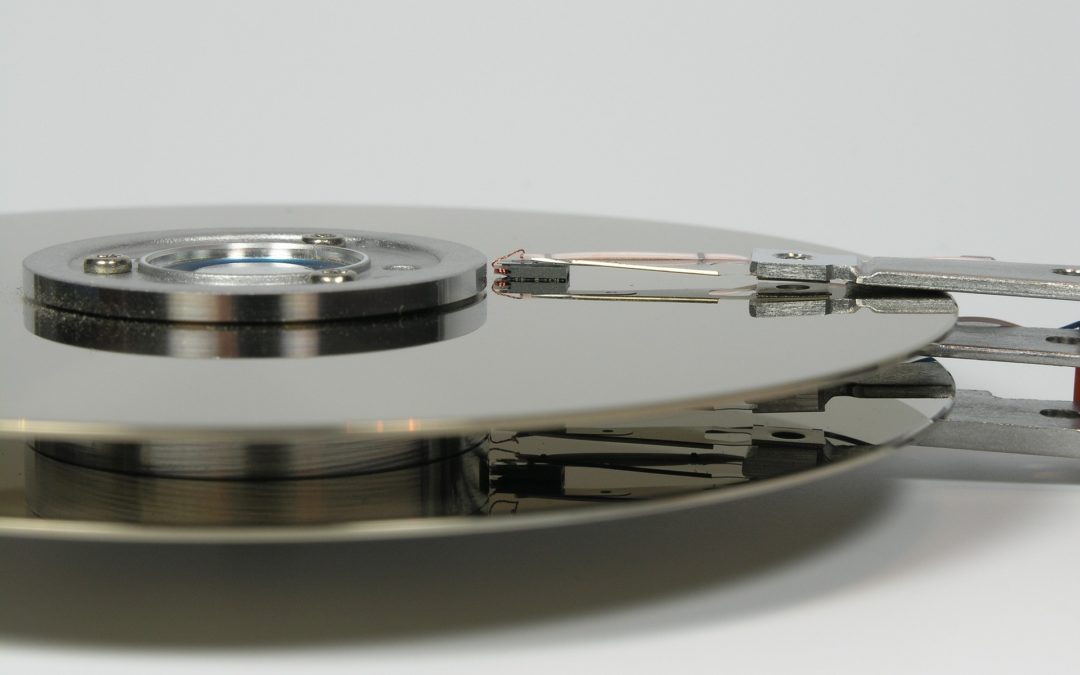
Once inside, you now need to locate your hard drive. A standard hard drive is a rectangular metal box the size and width of a small book. Your hard drive could be placed inside a cage fixed to the tower, or it will be on a set of rails. Conventionally most manufacturers locate the hard drive near the front of the computer case and will be labelled, so don’t go pulling out any other drives (like the optical drive, for example). Now you have located the hard drive you need to remove it. Some models will require a screwdriver to disconnect it from the case, while some will have a lever or a switch to disconnect it. Once the hard drive is disconnected, gently slide the hard drive outwards. You shouldn’t need to put any force on it to get it out, so if you encounter any resistance stop and make sure you’re not pulling something else out with it. If there are cables attached to the hard drive make sure you remove these before trying to take the hard drive out of the case. You can now safely dispose of the machine without worrying about giving away your data and have the hard drive destroyed by a professional data destruction service.
Laptops
Laptop hard drives can be considerably trickier to remove, mostly because they are kept within a sealed unit. For some laptops, the hard drive is easily accessible through a cover on the underside of the unit, which will be held in place with a few screws and when removed will reveal the motherboard and hard drive. But others (primarily Apple laptops) are a bit more complicated. Each laptop is manufactured differently, so you may need to look up the removal procedure for your specific machine if you are struggling to locate the hard drive.
Firstly, you need to unplug the laptop and power it down. If your laptop has a removable battery, take this out and press the power button for 3 seconds to remove any residual charge. Next, unscrew the back panel of the machine with the appropriate screwdriver and remove the panel. For Apple machines, the hard drive is always accessed through the back panel, but for other models of laptop, it can be accessed either through the back panel, underneath the keyboard or on the side of the machine. For Apple machines, disconnect the battery connector using the tab attached or a cocktail stick to gently push it out. For keyboard access machines, you will need to lift out the keyboard and remove the attachment strips to access the motherboard. For side access machines, you may need to remove a CD/DVD drive. Now remove the hard drive. Most laptop hard drives will be screwed in and have a lever or tab attached to remove it. Once any brackets have been lifted gently pull the hard drive out of the machine. You will need to disconnect any cables attached to the hard drive by gently removing the connectors before replacing the panels of your laptop.
Of course, this is just a broad overview of how to remove basic hard drives. Make sure you check your manufacturers manual for any more specific instructions before you start unscrewing things. Once removed you can safely dispose of your hard drive and be confident that your old machine hasn’t retained any of your data. For more information about hard drive destruction or to book your destruction slot, get in touch with Greenaway today.
Recent Comments